Hedge Trimming 101
Master the Art of Perfect Hedge Maintenance
Why Hedge Trimming 101 Matters
The Problem
Overgrown, poorly maintained hedges can:
- Reduce property value and curb appeal
- Block sunlight to lower branches, causing die-back
- Harbor pests and diseases
- Become structurally weak and unsightly
- Encroach on walkways and neighboring properties
The Solution
Proper hedge trimming 101 techniques provide:
- Enhanced property aesthetics and value
- Healthy, dense growth throughout the hedge
- Better air circulation and disease prevention
- Controlled size and professional appearance
- Long-term plant health and longevity
Hedge Trimming 101 Impact
Property Value Increase
Weeks Between Trims
Disease Prevention Rate
The Science Behind Hedge Trimming 101
Plant Biology & Growth Patterns
Apical Dominance
Plants naturally grow taller rather than bushier due to apical dominance – the main growing tip suppresses side growth. Strategic trimming redirects energy to lateral buds, creating dense, full hedges.
Light Requirements
The “batter” technique (wider bottom, narrower top) ensures all parts receive adequate sunlight. Without this, lower branches become woody and bare – a common hedge trimming 101 mistake.
Seasonal Growth Cycles
Understanding growth hormones and seasonal patterns is crucial for hedge trimming 101 success:
- Spring: High auxin production, rapid growth
- Summer: Peak photosynthesis, ideal trimming time
- Fall: Energy storage in roots
- Winter: Dormancy period, structural pruning
Seasonal Growth Pattern
Professional Hedge Trimming 101 Techniques
Essential Trimming Techniques
Learn the fundamental “batter” technique and why vertical cuts lead to dead wood. This hedge trimming 101 video demonstrates proper angles and cutting methods.
Quick & Clean Trimming Hack
Discover the tarpaulin method for mess-free hedge trimming 101. This simple technique saves hours of cleanup time.
The 4-Step Professional Process
Initial Hard Cut
Trim back hard to desired alignment using hedge trimmer. Don’t push the tool beyond its capacity – save thick branches for step 2.
Clean Cut Finish
Use sharp secateurs to make clean cuts on thicker branches that the trimmer handled poorly. Clean cuts heal better and look professional.
Remove Dead Wood
Clear out all dead wood from inside the hedge. This improves air circulation, reduces disease risk, and allows more light penetration.
Feed & Fertilize
Apply liquid seaweed fertilizer and slow-release granules. Feed again in a week for optimal recovery and new growth.
Interactive Hedge Trimming 101 Guide
Safety First
- Wear safety goggles and thick gloves
- Use ear protection with power tools
- Check for bird nests (March-August)
- Ensure stable ladder placement
- Use RCD with electric trimmers
Setup
- Lay tarpaulin for easy cleanup
- Set up guide strings for straight lines
- Check tool sharpness and condition
- Plan your cutting sequence
- Have first aid kit readily available
Cutting Technique
- Start from bottom, work upward
- Keep blades parallel to hedge side
- Cut in smooth, arc motions
- Make hedge wider at bottom (batter)
- Never cut into old wood on evergreens
Common Mistakes
- Cutting vertical sides (causes die-back)
- Using dull blades
- Cutting too much at once
- Ignoring natural growth patterns
- Trimming at wrong time of year
Shaping Principles
- Follow natural plant form
- Use string guides for straight tops
- Step back frequently to assess
- Trim conservatively – you can always cut more
- Consider mature size requirements
Shape Options
- Formal rectangular (most common)
- Rounded top (softer appearance)
- Tapered sides (recommended)
- Stepped design (for slopes)
- Creative topiary shapes
Final Steps
- Clear clippings from hedge top
- Apply mulch around base
- Water deeply after trimming
- Apply fertilizer if needed
- Clean and store tools properly
Aftercare
- Monitor for signs of stress
- Provide extra water during drought
- Watch for pest or disease issues
- Plan next trimming schedule
- Document results for future reference
Essential Hedge Trimming 101 Tools
Hand Tools
- Hand Shears: Small hedges, precise work
- Loppers: Thick branches up to 2″
- Pruning Saw: Large branches
- Secateurs: Individual branch cutting
Best For: Small hedges, detail work, soft growth
Electric Trimmers
- Corded Electric: Unlimited runtime
- Battery Powered: Cordless convenience
- Pole Trimmers: Extended reach
- Blade Length: 16-24 inches optimal
Best For: Medium hedges, regular maintenance
Gas Trimmers
- High Power: Thick, tough hedges
- Professional Grade: Extended use
- Articulated Head: Multiple angles
- Two-Stroke Engine: Maximum cutting power
Best For: Large hedges, commercial use
Hedge Trimming 101 Tool Comparison
| Tool Type | Power Source | Best For | Price Range | Maintenance |
|---|---|---|---|---|
| Hand Shears | Manual | Small hedges, precision | $15-50 | Low |
| Electric Trimmer | Corded/Battery | Medium hedges, homeowner | $50-200 | Medium |
| Gas Trimmer | 2-stroke engine | Large hedges, professional | $150-500 | High |
| Pole Trimmer | Electric/Gas | Tall hedges, extended reach | $100-400 | Medium-High |
Essential Safety Equipment
Safety Goggles
Protect eyes from debris and branches
Work Gloves
Thick leather or kevlar for grip and protection
Ear Protection
Essential for gas-powered tools
Hard Hat
Protection from falling branches
Perfect Timing for Hedge Trimming 101
Spring
March – May
- Light shaping cuts
- Remove winter damage
- Encourage new growth
- Check for bird nests
Summer
June – August
- Main trimming season
- Every 6-8 weeks
- Best growth recovery
- Avoid extreme heat days
Fall
September – November
- Final shaping trim
- Prepare for winter
- Remove diseased growth
- Stop 6 weeks before frost
Winter
December – February
- Dormant season pruning
- Structural corrections
- Hard reduction cuts
- Tool maintenance
Plant-Specific Hedge Trimming 101 Schedule
Evergreen Hedges
Yew, Boxwood, Privet
Trim 2-3 times per year: late spring, mid-summer, early fall
Coniferous (Pine, Spruce)
Once yearly in late spring. Never cut into old wood – won’t regrow
Laurel, Holly
Late spring to early summer. Use secateurs on large leaves
Deciduous Hedges
Beech, Hornbeam
Late summer (August). Retain autumn color through winter
Hawthorn, Blackthorn
After flowering in summer. Check local nesting bird regulations
Flowering Hedges
Within 6 weeks after flowering ends to preserve next year’s blooms
Hedge Trimming 101 Schedule Calculator
Hedge Trimming 101: Before & After Results
Overgrown Hedge Transformation

Drag the slider to see the transformation
Professional Box Hedge Trimming
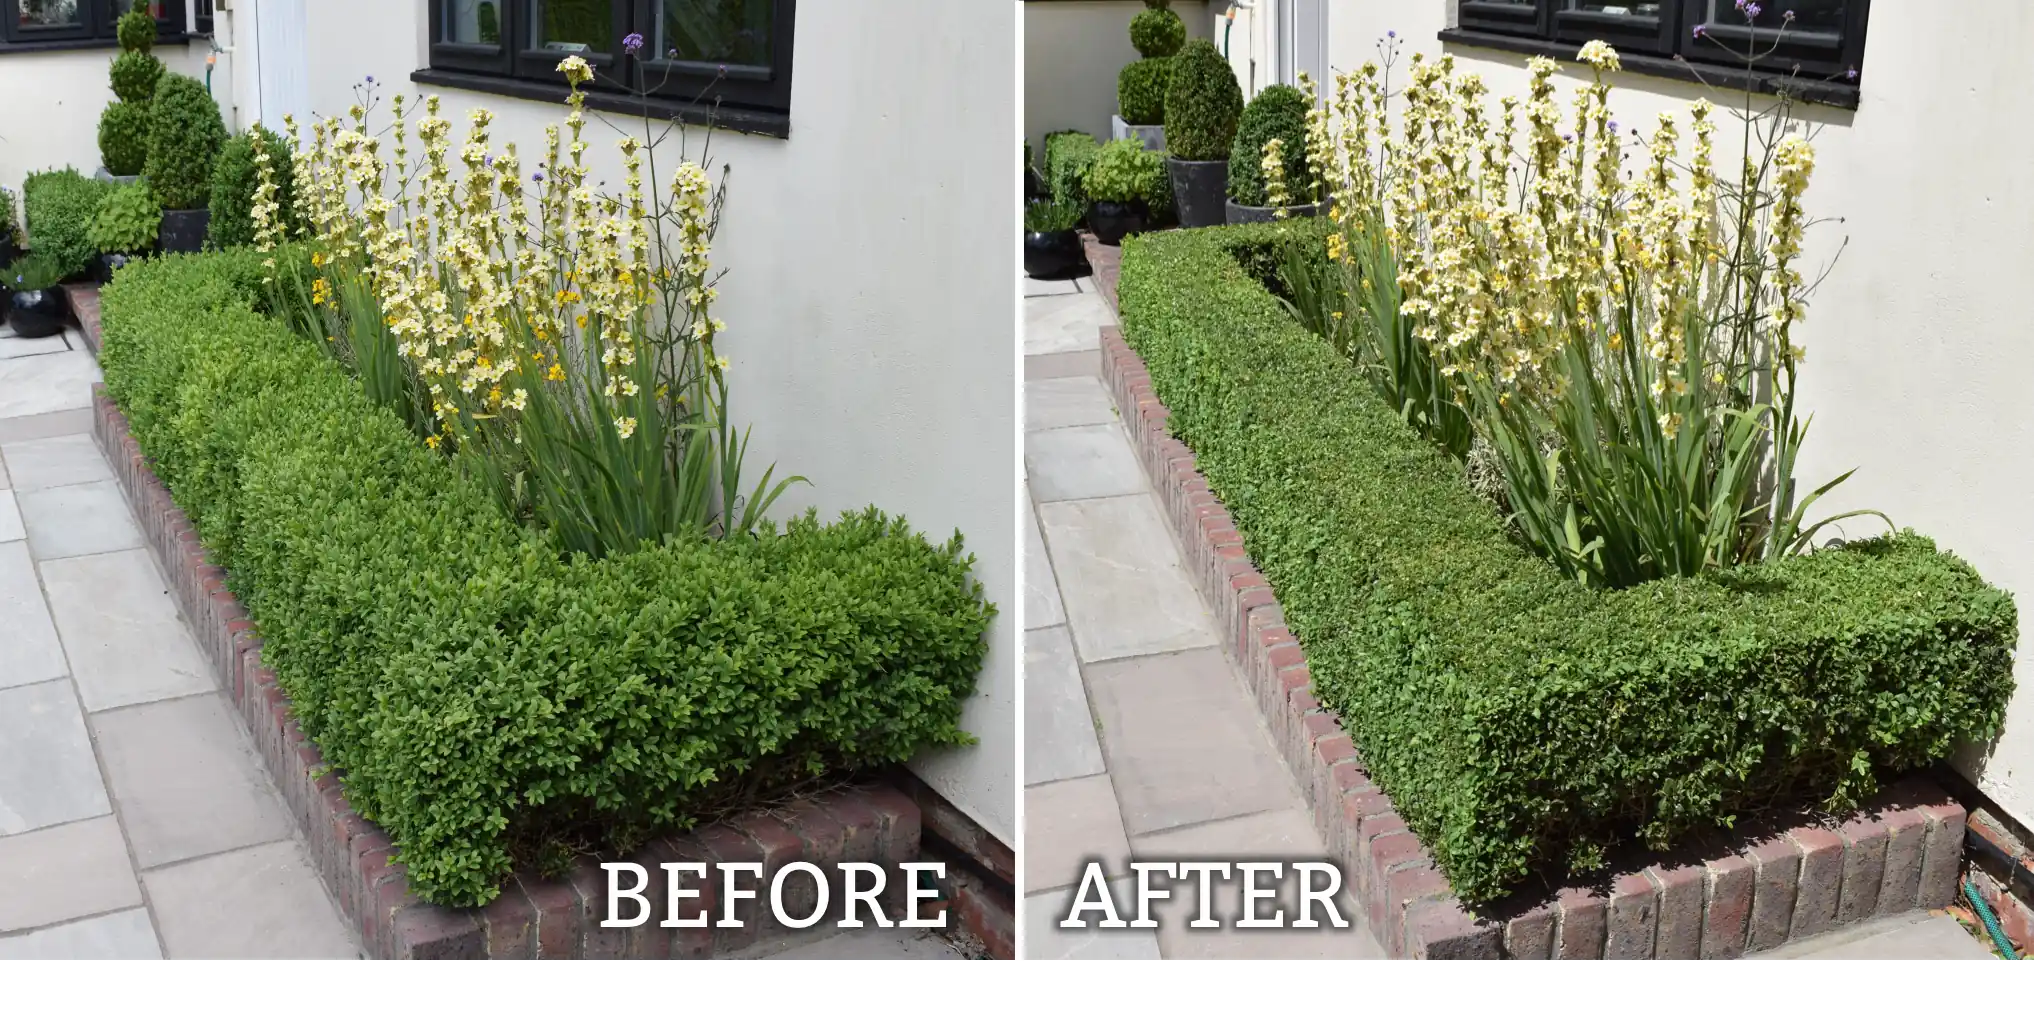
Professional box hedge trimming results
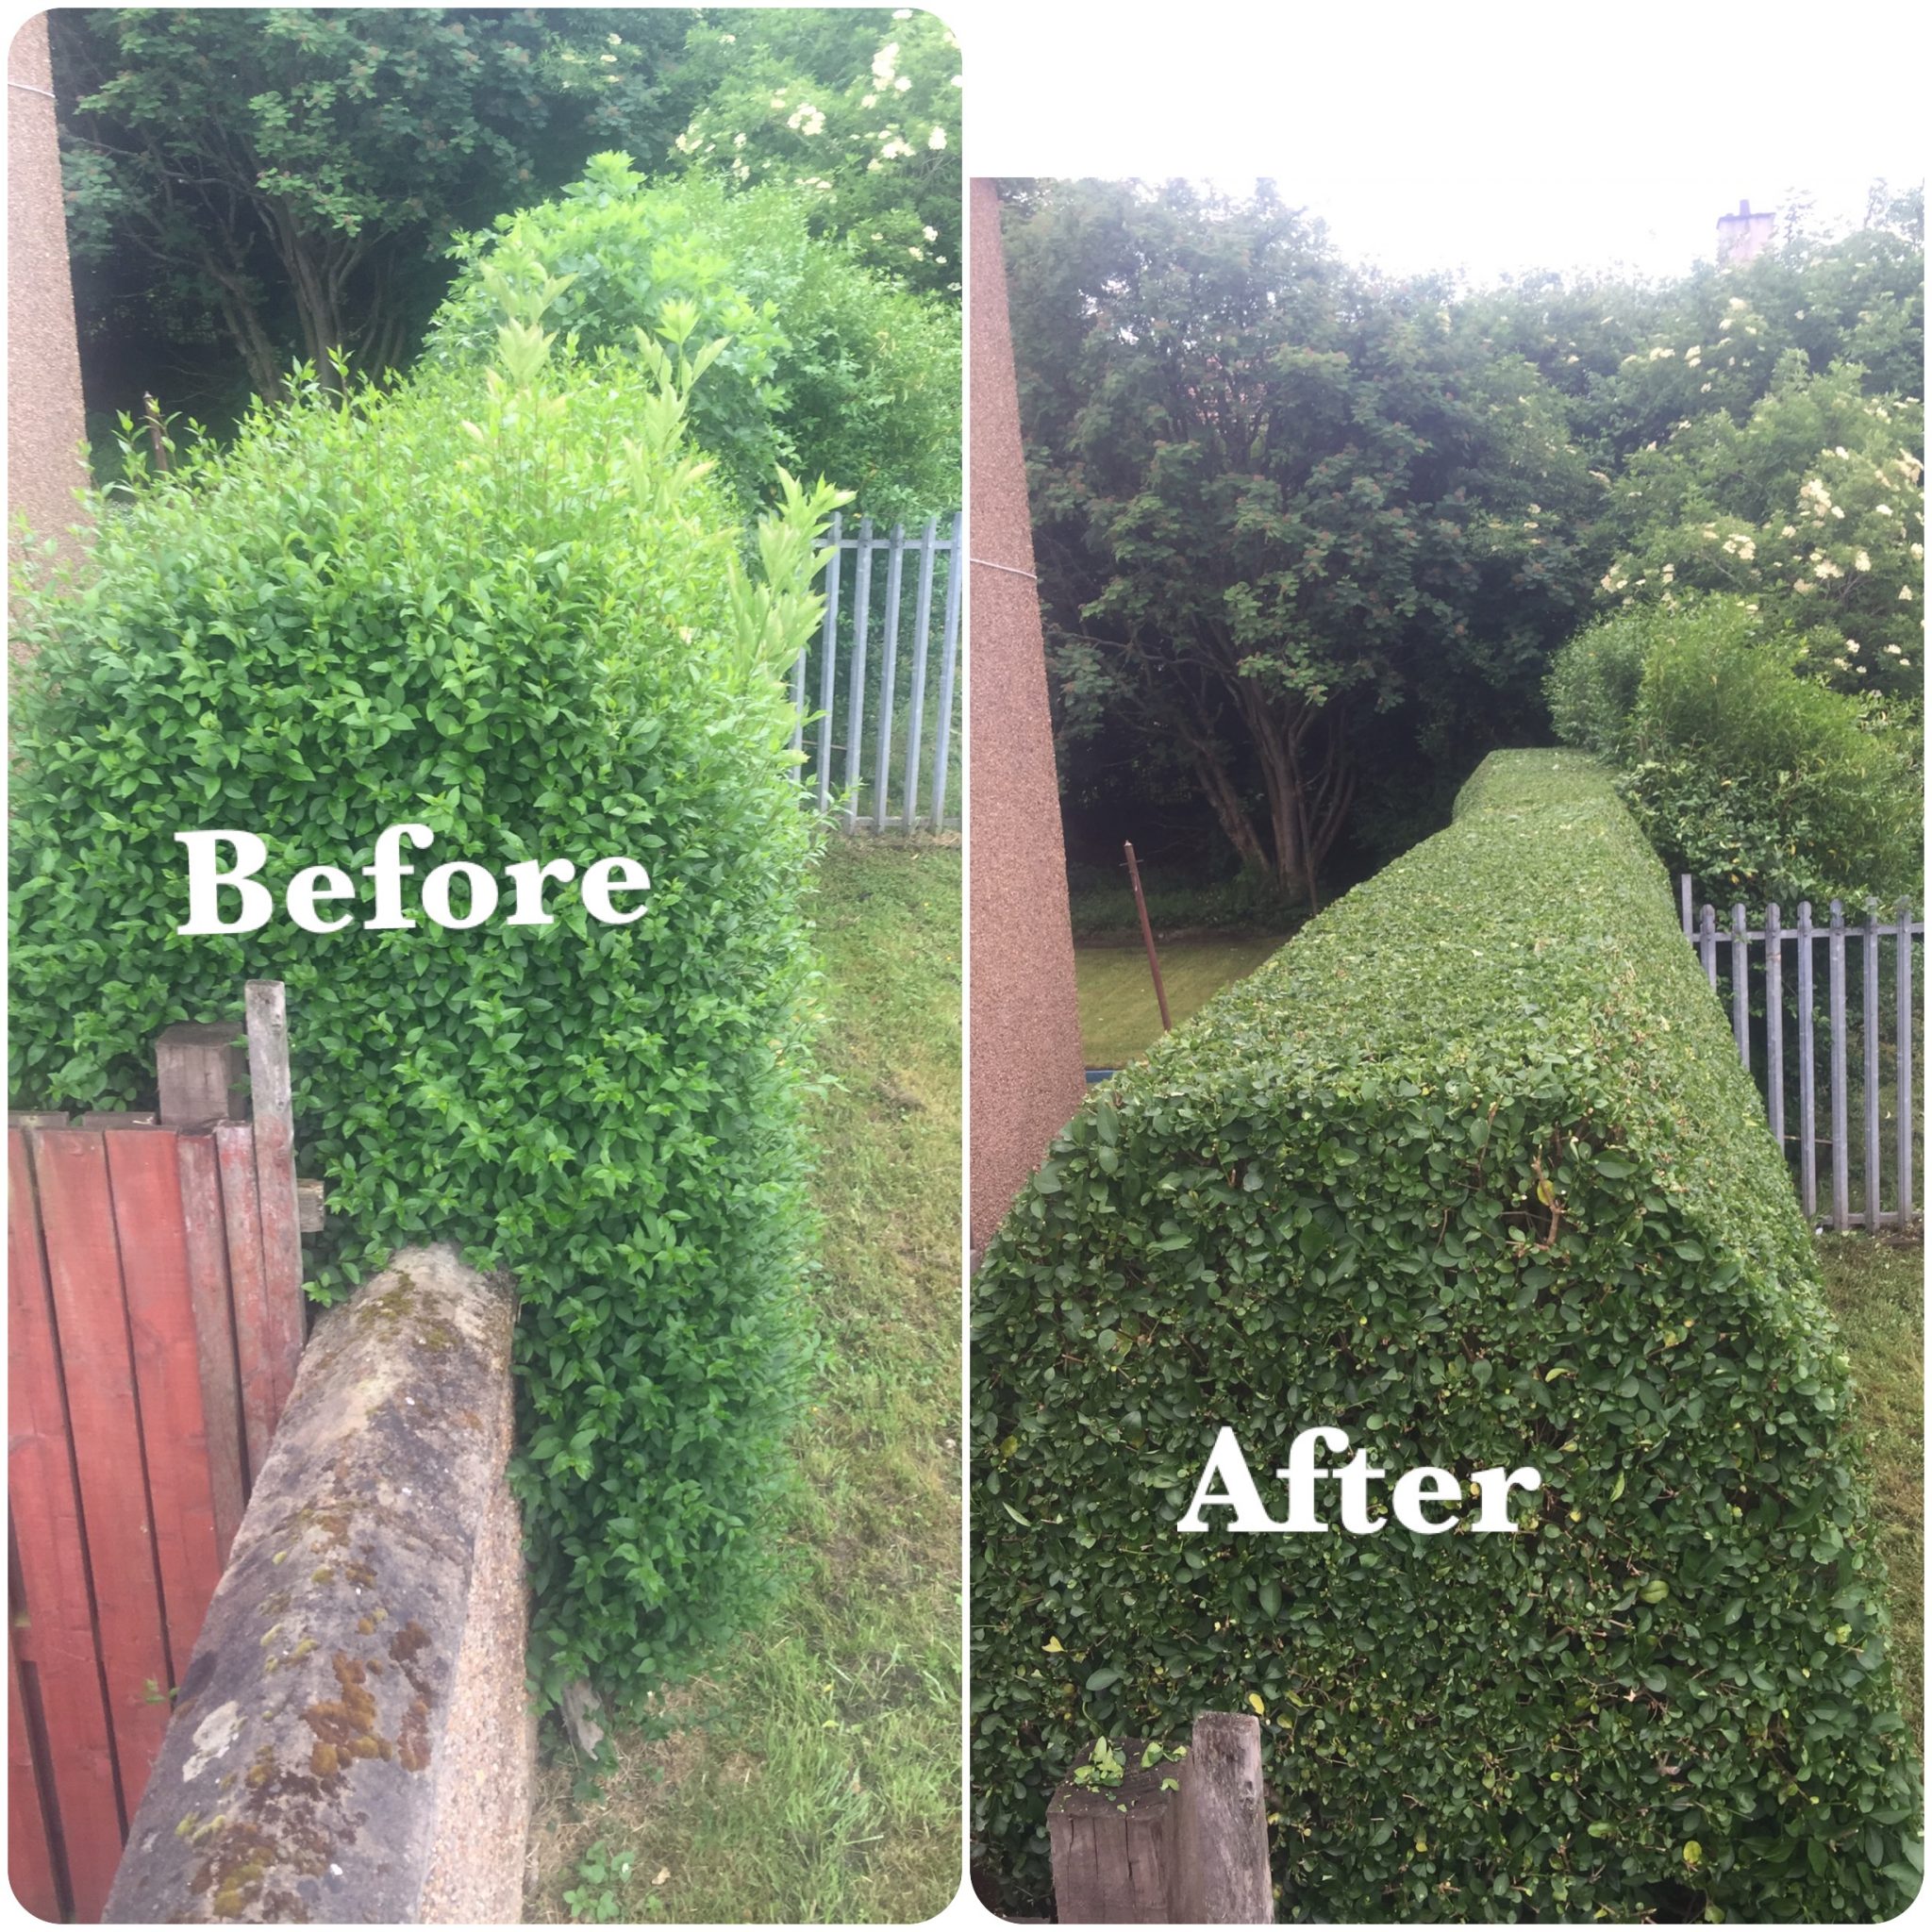
Long Hedge Maintenance
Professional trimming of extensive hedge boundary showing clean, straight lines

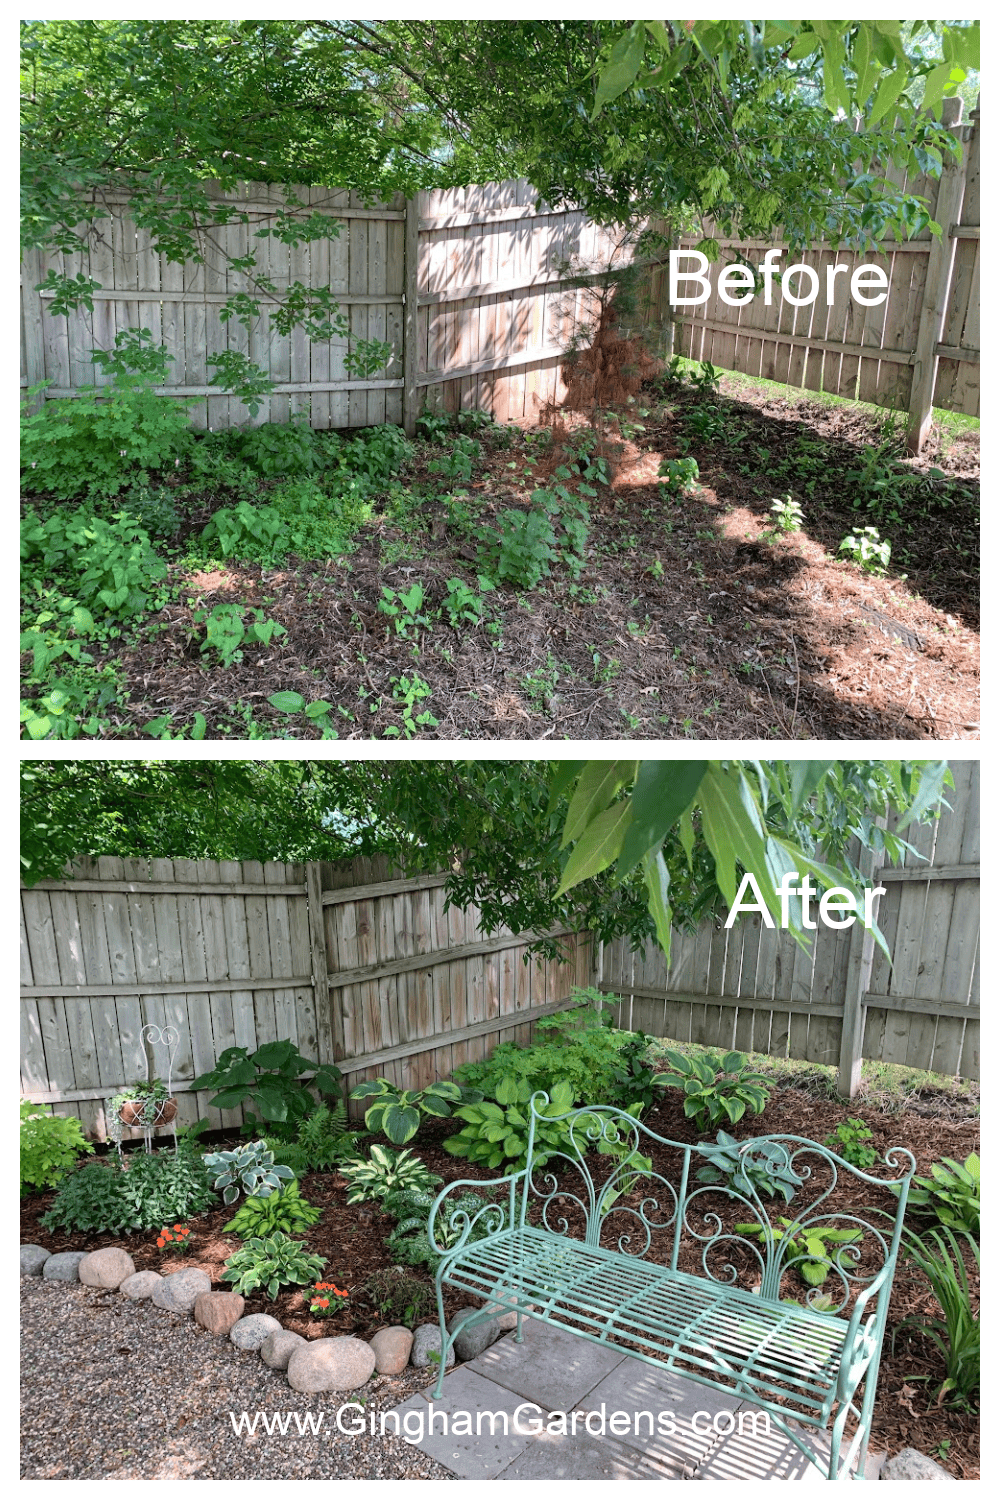
Backyard Transformation
Dramatic improvement in property appearance through proper hedge trimming 101 techniques

Professional Results
Commercial-grade hedge maintenance showing precision and attention to detail
Expected Results Timeline
Immediate (Day 1)
Clean, professional appearance. Enhanced curb appeal and property value.
Short Term (1-2 weeks)
New growth begins. Light green shoots appear. Plants recover from trimming stress.
Medium Term (4-6 weeks)
Dense, bushy growth fills in. Improved air circulation reduces disease risk.
Long Term (3+ months)
Fully established shape. Healthier root system. Increased resistance to pests and diseases.
Common Hedge Trimming 101 Mistakes & Solutions
Common Mistakes
Cutting Vertical Sides
Creates shade at bottom, causing die-back and bare patches
Using Dull Blades
Tears branches instead of clean cuts, leading to disease entry points
Wrong Timing
Trimming too late in season can expose new growth to frost damage
Over-Pruning
Removing more than 1/3 of growth stresses plants and reduces vigor
Ignoring Plant Type
Different species require different approaches and timing
Professional Solutions
Create Batter Shape
Keep bottom wider than top to ensure sunlight reaches all areas
Maintain Sharp Tools
Clean, sharp cuts heal faster and prevent disease infiltration
Follow Seasonal Schedule
Trim at optimal times for each species to maximize health and growth
Conservative Trimming
Remove only what’s necessary – you can always trim more later
Research Your Plants
Understand species-specific requirements before starting any hedge trimming 101 project
Hedge Trimming 101 Troubleshooting
Cause: Years of vertical cutting have shaded lower branches.
Solution:
- Implement batter shape immediately
- Thin top growth to allow light penetration
- Apply fertilizer to encourage new growth
- Be patient – recovery can take 1-2 seasons
Cause: Insufficient maintenance and gradual expansion over time.
Solution:
- Perform rejuvenation pruning in late winter
- Cut back to desired width gradually over 2-3 seasons
- Use string lines to maintain straight edges
- Increase trimming frequency to 6-8 weeks
Cause: Poor nutrition, overwatering, or insufficient light.
Solution:
- Apply balanced fertilizer in spring
- Improve drainage if soil is waterlogged
- Thin surrounding vegetation for better light
- Mulch around base to retain moisture and nutrients
Cause: Inconsistent cutting technique or following uneven existing shape.
Solution:
- Use string guidelines for straight lines
- Step back frequently to assess progress
- Mark cutting heights with stakes
- Consider professional help for major corrections
Hedge Trimming 101 FAQ
Most hedges need trimming every 6-8 weeks during the growing season (spring through early fall). Fast-growing species like privet may need monthly attention, while slow-growers like yew can be trimmed 2-3 times per year. The key to successful hedge trimming 101 is consistency rather than severity.
The optimal time depends on your hedge type. For most evergreens, trim in late spring through early fall. Deciduous hedges are best trimmed in late summer. Avoid trimming during extreme heat, drought, or within 6 weeks of expected frost. Always check for nesting birds during spring and early summer before starting any hedge trimming 101 project.
The choice depends on hedge size and your physical capabilities. Hand shears work well for small hedges and precision work but become tiring on large projects. Electric trimmers (corded or battery) are efficient for medium-sized hedges, while gas trimmers handle large, thick hedges best. For hedge trimming 101 beginners, start with quality hand shears to learn proper technique.
Never remove more than one-third of the plant’s growth in a single session. For maintenance trimming, aim to cut just the current year’s growth. If your hedge needs major reduction, spread the work over 2-3 seasons to avoid shocking the plants. This is a fundamental principle of hedge trimming 101 that ensures plant health and recovery.
Bottom die-back typically results from inadequate light reaching lower branches. This happens when hedges are cut with vertical sides, creating shade below. The solution is to adopt the “batter” shape – wider at the bottom, narrower at the top. This hedge trimming 101 technique ensures all parts receive adequate sunlight for healthy growth.
Winter trimming is acceptable for dormant deciduous hedges and can be ideal for major structural work. However, avoid trimming evergreens in winter as they can suffer frost damage on fresh cuts. Never trim when branches are frozen or brittle. Winter is an excellent time for tool maintenance and planning your hedge trimming 101 schedule for the coming year.
Use string guidelines stretched between stakes at both ends of your hedge. Set the string about 1 inch below your desired cutting height. For long hedges, add intermediate stakes to prevent sagging. Take frequent breaks to step back and assess your progress. Professional hedge trimming 101 always involves planning and guidelines for consistent results.
Healthy clippings can be composted, but mix them with other organic materials for proper decomposition. Small clippings can be left as mulch around the hedge base. Remove diseased material completely and dispose of it in municipal green waste. Using a tarp during trimming, as shown in our hedge trimming 101 videos, makes cleanup much easier.
Fertilizing after trimming helps plants recover and promotes healthy new growth. Apply a balanced liquid fertilizer immediately after trimming, followed by slow-release granules around the base. Water deeply after fertilizing. This is especially important for heavy pruning or rejuvenation work as part of your hedge trimming 101 maintenance routine.
Consider professional help for very tall hedges requiring ladders, major rejuvenation work, or if you’re dealing with valuable specimen plants. Professionals have the right equipment, insurance, and expertise for complex jobs. However, basic hedge trimming 101 maintenance is well within most homeowners’ capabilities with proper technique and tools.
Master Hedge Trimming 101 Today
Transform your landscape with professional hedge trimming techniques. Start implementing these proven methods and see immediate results in your garden’s appearance and health.
Watch & Learn
Follow our embedded video tutorials for step-by-step guidance
Plan & Schedule
Use our timing guides to create the perfect maintenance schedule
Equip & Execute
Choose the right tools and implement professional techniques
Quick Reference Checklist
Before You Start:
- ✓ Check for bird nests
- ✓ Sharpen tools
- ✓ Set up safety equipment
- ✓ Lay protective tarps
- ✓ Plan your cutting lines
After Trimming:
- ✓ Clear clippings from hedge top
- ✓ Apply liquid fertilizer
- ✓ Water deeply
- ✓ Clean and store tools
- ✓ Schedule next trimming
